


How to Install a Shower Filter and Check for Leaks
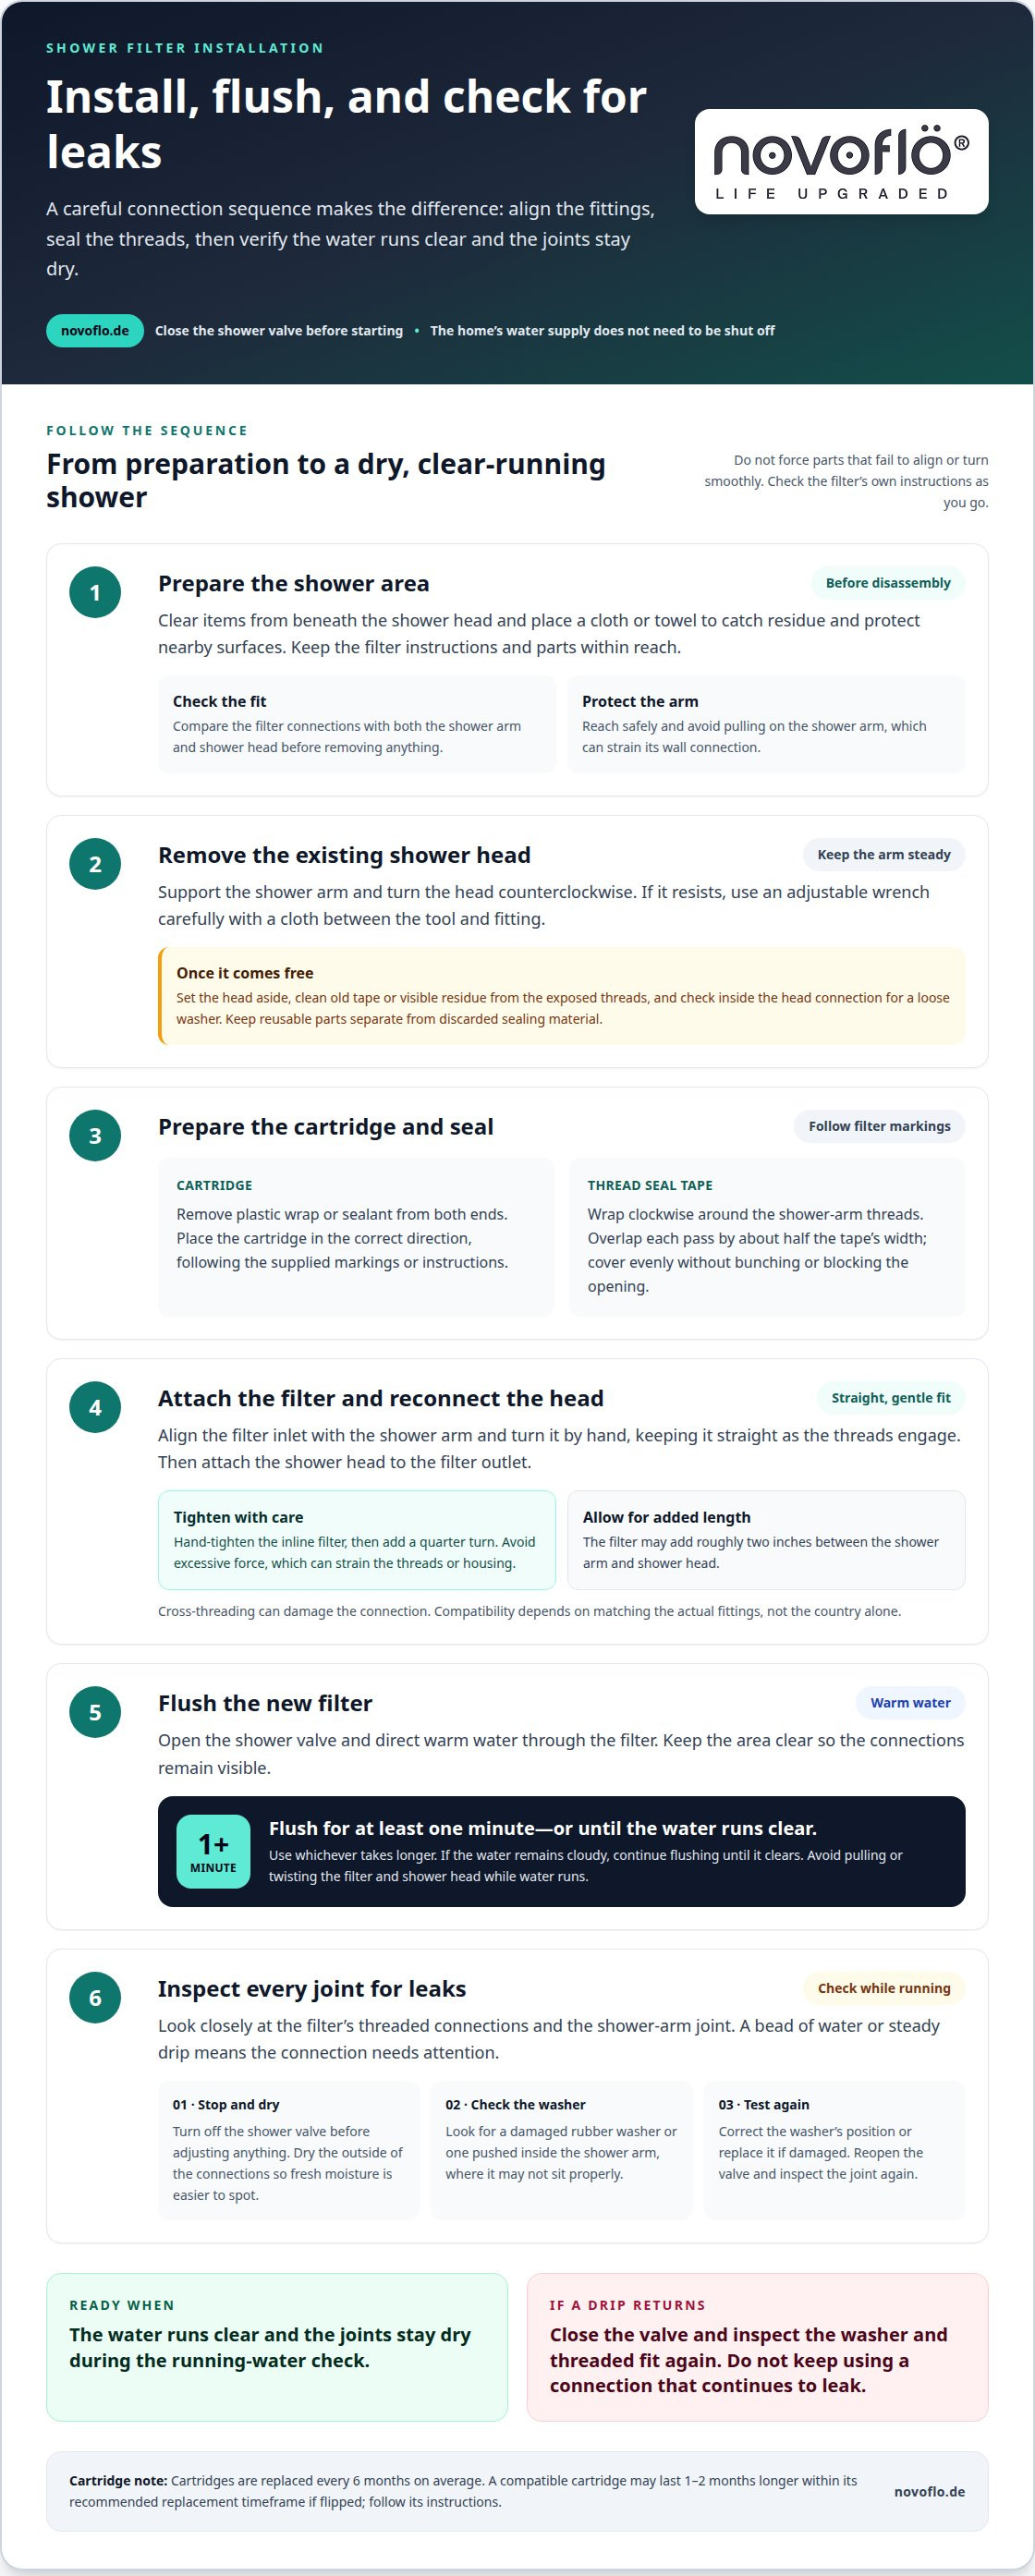
Installing a shower filter is straightforward when you follow the connection sequence and check the seal before finishing. To learn how to install a shower filter, close the shower valve, remove the existing shower head, attach the filter to the shower arm, then reconnect the head. Check the shower valve and connections before you begin, and follow the filter’s installation instructions. Flush the new filter with warm water for at least one minute or until the water runs clear.
A clean, secure fit matters more than force. Gather the materials you need, prepare the threaded connection, and tighten it carefully to help prevent leaks. Once the water is running, inspect the joints and check the rubber washers if you notice a drip.
This guide walks you through the job in order: what to gather, how to fit a shower filter, how to flush the cartridge, and how to troubleshoot a leak. You’ll know what to do before you start, what to look for as water flows, and when the installation is ready for your next shower.
Key Takeaways
- Prepare the shower area and gather the materials before removing the existing shower head.
- Close the shower valve before you start; the home’s water supply does not need to be shut off.
- Fit the filter securely to the shower arm, paying attention to the thread seal and rubber washers.
- Flush the new filter with warm water for at least one minute or until the water runs clear, then inspect each connection for leaks.
Flushing the filter and checking for leaks
After installation, flush the filter and inspect every connection while water runs. An incorrect fit can let water escape at a threaded joint, so treat any drip as a signal to stop and inspect the seal.
Flush the Filter
Open the shower valve and direct warm water through the filter. Keep the shower area clear so you can see the connections and observe the water as it flows.
- Run warm water through the newly installed filter for at least one minute, or until the water runs clear. Use whichever takes longer.
- Watch the water leaving the shower head. If it remains cloudy, continue flushing until it clears rather than ending the step early.
- Keep the valve open during the flush, but avoid pulling or twisting the filter and shower head. Movement can disturb the connection you need to inspect next.
Check for Leaks
With the water running, look closely at the filter’s threaded connections and the shower-arm joint. A bead of water or steady drip indicates a connection that needs attention.
- Inspect around each joint, then turn off the shower valve before adjusting anything. Dry the outside of the connections so fresh moisture is easier to spot.
- If a connection leaks, inspect its rubber washer. Check whether it is damaged or pushed inside the shower arm, where it may fail to sit properly.
- Correct the washer’s position or replace it if damaged, then reopen the valve and inspect the joint again. Don’t keep using a connection that continues to leak.
Finish only when the water runs clear and the joints stay dry during the running-water check. If a drip returns, close the valve and inspect the washer and threaded fit again before testing once more.
At a leaking connection, inspect its rubber washers to check whether they are damaged or pushed inside the shower arm. Give the washer itself attention during the inspection, rather than considering only the threaded connection. Check both its condition and its position: damage or placement pushed inside the shower arm are the specific issues to look for. Keep the washer check focused on those signs when tracing the leak.
Preparing the shower area and removing the existing shower head
Before fitting a filter, clear the shower area and identify how the existing head connects to the shower arm. Choose a filter whose connections match your setup and follow its installation instructions.
Prepare the Shower Area
Close the shower valve before starting; you don’t need to shut off the home’s water supply. Clear bottles and other items from beneath the shower head so they won’t obstruct your work or get wet.
- Place a cloth or towel in the shower area to catch residue and protect nearby surfaces.
- Keep the new filter’s instructions and parts within reach. Check the filter’s connection points against the shower arm and the existing shower head before removing anything.
- Make sure you can reach the shower arm without leaning against a wet or slippery surface. Avoid pulling on the arm, which can put strain on the wall connection.
Remove the Existing Shower Head
Grip the shower head and turn it counterclockwise to loosen it from the shower arm. If it resists, use an adjustable wrench carefully, placing a cloth between the tool and the fitting to help prevent scratches.
- Support the shower arm while turning the head. This keeps the arm from twisting as the threaded connection loosens.
- Once the head comes free, set it aside and inspect the exposed threads. Remove old tape or visible residue so the next connection can sit cleanly.
- Look inside the shower head connection for a washer that has come loose. Keep reusable parts separate from discarded sealing material.
Check the filter’s instructions before proceeding. Shower arms and filter fittings can differ, so don’t force parts that fail to align or turn smoothly. A clean, undamaged threaded end gives the next connection a better starting point.
Attaching a shower filter to the shower arm
Match the filter’s inlet and outlet to the shower arm and shower head, then connect them without forcing the threads. For a clean fit, prepare the cartridge, wrap the shower-arm threads, and tighten the connections in sequence.
Shower-filter compatibility in Egypt depends on the actual fittings, not the country alone. Check that the filter connections match both the shower arm and head before assembly.
Cartridges are replaced every 6 months on average. A compatible cartridge may last 1-2 months longer within its recommended replacement timeframe if flipped, but follow its instructions.
A shower filter can reduce chlorine if its filtration media is designed to target it. A shower filter’s effect depends on its filtration media, so check whether it is intended to address hard water or limescale.
- Prepare the cartridge. Remove any plastic wrap or sealant from both cartridge ends before placing it inside the filter housing. Check that the cartridge sits in the correct direction, following the markings or instructions supplied with that filter.
- Seal the shower-arm threads. Wrap thread seal tape clockwise around the threaded end. Overlap each pass by about half the tape’s width, covering the threads evenly without bunching the tape or blocking the opening.
- Attach the filter. Align the filter inlet with the shower arm and turn it by hand. Keep the filter straight as the threads engage. Cross-threading can damage the connection and prevent a secure fit.
- Tighten the connection. Hand-tighten the inline filter, then add a quarter turn. Avoid using excessive force, which can strain the threads or housing. The filter may add roughly two inches between the shower arm and shower head, so account for that added length.
- Reconnect the shower head. Attach the head to the filter outlet, aligning the threads before turning. Tighten it securely by hand, then check that the head points in the desired direction without twisting the filter loose.
Wrap the tape evenly clockwise, overlapping each pass by half its width. After hand-tightening, finish the inline filter with a quarter turn.
Tools and materials for installation
Gather the filter, its cartridge, and the tools before opening the shower connection. A clear workspace helps you keep small parts together and avoid reaching for supplies with wet hands.
- Set out the shower filter and cartridge. Keep the filter’s instructions nearby, since connection details can vary by model. Check that the cartridge is present and fits the housing before you begin. Keep any removable caps or packaging separate from parts needed for assembly.
- Prepare thread seal tape. This tape wraps around the shower arm’s threaded end to help seal the connection. Keep the roll within reach, and use it only on the threaded joint specified by the filter instructions.
- Keep an adjustable wrench nearby. It can help loosen a stubborn existing shower head. Place a soft cloth between the wrench and the fitting to reduce scratches, and use controlled pressure rather than forcing a stuck connection.
- Use a soft cloth for grip and protection. Set one cloth around the fitting if a tool is needed, and keep another available to dry the shower arm. A dry surface makes it easier to see threads and handle small components.
- Prepare a clean place for removed parts. Use a small tray or clean surface to hold the old shower head, loose washer, and filter components. Keeping these items together makes it easier to identify a displaced washer during assembly.
- Keep warm water available for the final flush. After fitting the filter, you’ll need to run warm water through it for at least one minute or until it runs clear. Keep the shower area clear so you can see the connections during the next leak check.
Skip extra tools that don’t fit the connection. For the filter and cartridge needed for your setup, choose a shower filter designed for everyday shower use.
Novoflö: Novoflö shower filter
The Novoflö shower filter is a practical option for reducing chlorine and targeted impurities in shower water. German-engineered for domestic water conditions in Egypt, it fits into a personal shower routine focused on supporting healthier skin and hair.
Choose it when you want point-of-use filtration for your shower rather than a whole-house system. Follow the installation sequence above, flush the filter, and inspect the connections for leaks before regular use. Keep cartridge care in mind as part of your routine.
For a shower filter designed for everyday water conditions in Egypt, contact Novoflö to learn more.
Make Your Next Shower Setup Count
Installing a filter is a practical change, but choosing one should start with what you want from your shower water. As you decide how to install a shower filter, consider the role filtration should play in your routine and follow the setup steps carefully. Knowing how to install a shower filter helps you avoid forcing a fitting or overlooking a leak.
The Novoflö shower filter is an option for people seeking shower filtration that reduces chlorine and targeted impurities. If you’re considering it and have questions about the product or its fit with your shower setup, contact Novoflö with your questions.
Take the next step at your own pace. A well-chosen filter and careful setup can make filtration a more deliberate part of your everyday routine.
Frequently Asked Questions
What tools and supplies are needed to install a shower filter?
Gather an adjustable wrench, a soft cloth, thread seal tape, the filter and cartridge, and the product instructions. A small tray keeps washers and caps from getting lost during setup. Use the wrench only if hand-loosening the existing head fails, and protect the fitting with the cloth. Avoid adding adhesives or extra sealants unless the filter instructions call for them.
How do you install a shower filter on a handheld or fixed shower head?
For a fixed head, connect the inline filter between the shower arm and head if the fittings match. For a handheld setup, the filter usually sits between the shower arm and hose, with the hose reconnected to the filter outlet. Check the filter’s inlet and outlet markings, then follow its instructions. Don’t force a connection if the threads don’t align smoothly.
How do you prevent leaks when installing a shower filter?
Start each threaded connection straight and tighten it without forcing the fitting. After assembly, place a dry tissue around each joint while water runs; the first damp spot can help pinpoint a leak. If moisture appears, close the shower valve and inspect the washer and thread alignment. Replace a damaged washer, then test the joint again before regular use.


